October 8, 2013

How To Clean Candle Jars

Hey everyone!

Fun fact- I like to scroll through Pinterest while taking a study break (I'm pretty sure most college kids do the same). Today, I saw some awesome DIY projects that only require glass candle jars and acrylic paint. Since I had some empty candles, I figured I would do a blog post about cleaning out the jars once you burn the entire candle. I don't know about you, but when I finish an entire candle I feel pretty accomplished :)

This is a really simple process, but it can be time-consuming. It usually takes me around 10 minutes to fully clean each jar. The great thing about this project is it doesn't take skill or concentration, and you can probably find everything you need somewhere in your home. 

So, on to the tutorial!

Materials:
- Candle jar
- Butter knife
- Dish soap
- Cloth or rag
- Nail polish remover (preferably with acetone)
- Cotton balls
- Water

Instructions: 
1. First, you want to make sure your candle is completely burned (no sense in wasting it!). There will most likely be 1/2" or so of wax left at the bottom of the jar. Place the candle in the freezer and let it sit for a few hours.

2. After the candle is complete cooled, use a butter knife to break up the wax into smaller chunks. This shouldn't take a lot of effort or force. The pieces of wax should lift right out of the jar once you break them up a bit. 


3. You may or may not need to do this step (I got lucky and didn't have to). If the glue from the wicks or the wicks themselves are stuck to try jar, just place some hot water in the jar and let it sit for a few minutes. Pour out the water, and you should be able to remove the wicks and/ or glue easily. 

4. Peal off the stickers from the outside of the jar. The sticker on the front of my candle came off cleanly, but the bottom sticker gave me some trouble. I used the butter knife to remove most of the sticker. After that, I took a cotton ball soaked in nail polish remover and removed the rest of the stubborn sticker. 


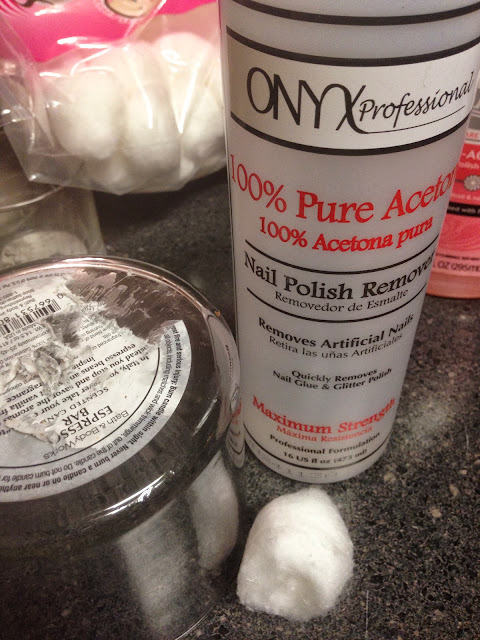
5.  There may be some residue left around the inside or outside of the candle. Simply take another cotton ball soaked in the nail polish remover and wipe off the residue. You should be left with a squeaky clean jar. 

6. Wash the jar with warm water and soap to remove any stuck on glue or wax. I used a pretty abrasive dish cloth and Dawn dish soap. 

7. Enjoy your clean glass jar, and unleash your creativity!!


----------

I hope this tutorial was helpful and easy to follow! Be on the look out for more DIY tutorials- hopefully I'll make something out of these empty jars sometime soon :) Until then, thank for reading!

Keri <3

September 12, 2013

Syria

Hi, again.

Before I even get started let me just say this: I am not going to state my opinion on the situation in Syria. I don't want to offend or upset anyone, and I really don't want to start a debate/ argument over something that I cannot change. Everyone is entitled to their own opinion, but I don't wish to state mine at this point in time. 

That being said, I came across this interesting article on Facebook. My high school World History teacher shared it on her wall, and asked everyone to take a few minutes to read it. The article, a statement from Vladimir Putin, is addressed to the American people. He goes into a little bit of detail about the situation in Syria, but he mainly focuses on what plan of action would most effectively end the violence in the country. I'll let you read it for yourself before I say anything else. 


Click the image above to read the article
This has to be the most interesting article I've read concerning the chemical warfare being used in Syria.  Again, without saying too much, this quote really struck a chord with me: "A strike would increase violence and unleash a new wave of terrorism."  However you feel about the current events taking place in Syria, I urge you to read the article.  Whether you agree or disagree with him, Putin gives us a new perspective on the incident and offers the world a solution to the problem.
Please don't think I'm pushing my political view on you in any way.  After reading this article, I felt enlightened on the situation.  If you haven't watched President Obama's address to the nation (from 9/12/2013), you can watch a video of that here.  It's a bit long, but, again, I think it's worth watching. 
Hope this helps you become more informed on current world events.  Thanks for reading, and I hope to talk to you guys again soon :)
Keri <3

September 11, 2013

Remembering 9-11

Hi guys!

Today's post is going to be very different from all of my other posts thus far. I want to discuss the events that took place on 9-11-2001. 

As an American, it's hard to think about those events without feeling an array of emotions- anger, sadness, a sense of loss, depression, fear. I cried when I woke up this morning, not for my own loss, but for the loss and suffering millions of people throughout the US. We, as a country, suffered tremendously after the attacks on the Pentagon and the World Trade Center. However, I also feel a sense of pride: the men and women on United 93 made their country so proud. They were the heroes of 9-11. 

I remember where I was and what I was doing when I heard the news. My third grade class was in the middle of our weekly spelling quiz before my teacher got a phone call. He immediately turned on the television, and we watched the events unfold. The first tower had already been hit, and we watched, in fear, as the next plane crashed into second tower. All the students in the school were asked to wait in the cafeteria until our parents could pick us up; my mom was at the school in a matter of minutes, and took my brother and I home.

I remember being confused and terrified. Being so young, I wasn't exactly sure what was going on, but I knew something was very wrong. I saw my dad sitting on the couch when I got home, and asked him what had happened. Him and my mom explained everything to my brother and I, but it was still difficult to understand the magnitude of what had happened in New York. My mom called my aunt (who lived in NYC and worked less than 5 blocks away from the Twin Towers), to make sure she was ok. Her and her family were alright, but extremely shaken and in a state of utter shock. Who would do this? And why? I couldn't comprehend it at the time. 

My family kept the news on for the rest of the day. We later found out another plane had crashed into the Pentagon, and another, headed for the White House, was grounded in a field in Pennsylvania. I don't remember much else, but what I do remember is vivid and will be etched in my memory forever. 

About a month before the attacks, we had flown to New York for my aunt's wedding. We had seen the Twin Towers from a distance. A year and some months after 9-11, my mom and I visited NYC for my birthday. Ground Zero, the site where the towers had once stood, was almost completely cleared of rubble and debris. We drove by a chain link fence where children and adults had pinned thank you cards to it. Some were tributes to family member and friends, while others were from one stranger to another. It was at this point I realized that these attacks, no matter how traumatic, had brought the country together. I remember hearing the song "I Am Proud To Be An American" on almost every street corner. The song still brings me to tears because of this memory. 

We grew strong once again, even though the War on Terror raged in the Middle East. I was never in support of the war, but I understand why it had to happen. We couldn't stand by and let another country terrorize the American people; we had to act. 

I still can't believe 12 years have passed since that day. It's hard for me to believe, even now, that the towers are gone and so many lives were lost in a matter of hours. 9-11-2001, the day that will live in infamy forevermore. 

Take some time- even if it's only a few minutes- to tell your friends and family that you love them. Make an effort to help the men and women that serve this great country. Donate blood, money, time, or whatever you can. Make a difference in someone's life. 

"United we stand, divided we fall." 


Keri <3

August 23, 2013

DIY Galaxy Backpack

Hey there!

I have an awesome "back to school" DIY for you guys today! You could probably tell by the title: this week I made a galaxy backpack. Now, this wasn't my own idea- I got it from LagunaBeachLove10's video on YouTube. Since I couldn't find any backpacks I really liked from Target or Walmart, I decided to make my own. Honestly, I wasn't expecting to like the backpack as much as I do. You don't have to be precise or perfect when creating the galaxy design (it's actually better to be spontaneous), which is why I loved making this bag so much! So, without any further ado, let's get started with the DIY!!


Supplies

  • Black canvas backpack of your choice
  • Blankets and/or pillows
  • Apple Barrel acrylic paint in "White"
  • Apple Barrel acrylic paint in "Fuchsia"
  • Apple Barrel acrylic paint in "Purple Iris"
  • Apple Barrel  acrylic paint in "Bimini Blue"
  • Folk Art Extreme Glitter acrylic paint in "Silver"
  • Paper plates
  • Makeup wedges/ sponges
  • Napkins or paper towels
  • Plastic drinking straw
  • Trash bags, newspaper, or a drop cloth
  • Painters Opaque Paint Marker in "White" (optional)
  • Silver glitter paint (optional)
  • Paint brushes (optional)


I bought my backpack from Target for $35. It's just a basic black bag, but it's big enough to hold all my books and binders for class. Buy the off-brand/ cheap makeup sponges if you can find them (I bought the Equate brand and saved over $3!). I bought the Apple Barrel acrylic paints from Walmart for $0.57 each; the Folk Art silver glitter paint was $1.97. You could spend a bit more money and buy some nicer acrylic paints, but I didn't think it was totally necessary for this project. The cheaper paints worked just fine for me :) I bought some cheap paint brushes as well. If you already have some laying around your house, you could use those and save yourself some money. Also, I didn't end up using the paint marker I bought, but I may use it to add some stars once the paint dries. I'm still undecided.


Instructions

  1. Cover your work area. This is a pretty messy project, so I would suggest laying down some newspaper or trash bags (you could also use a drop cloth if you happen to have one laying around).
  2. OPTIONAL: If you want, you can use a seam ripper and detach the label on your bag. I wanted to keep mine on, so I skipped this step.
  3. Stuff your bag. To ensure an even canvas, fill your backpack with some blankets, towels, or pillows. It just makes it easier to paint.
  4. Tape off the parts of the backpack that you don't want painted. I covered the straps, zipper pulls, the label, and handle. You don't have to use as much tape as I did on the back, just as long as the parts are covered that you want to keep unpainted. 
  5.  


  6. If you want, find a reference picture. It helps tremendously if you look at pictures of galaxies while you paint. That way, you can get a feel for where the colors should go. As with any DIY, the design is completely up to you! I winged it for the most part, but I did have some random galaxy pictures pulled up on my phone while I worked.
  7. Pour some blue paint on a paper plate, and start painting your bag. If you want, you can add a bit of white paint to the blue to make it stand out a bit more. I originally started with just the blue, but I did add some white. Trust me, it makes a difference! Cover most of the bag in blue, leaving some black spaces for contrast. I like to dip the sponge in the paint, then dab off the excess on the edge of the plate. That way, you won't get any patches of paint in one spot. You want this to be blended and almost subtle at first (you can always add more color, but you can't really take color away). When paint the bag, I dab the sponge first, and then I blend the color by swiping the sponge around the area I want painted. Blend the blue into the black by using a clean sponge or your fingers.


  8. Begin adding purple to the bag. Concentrate the purple in fewer spots than the blue- remember to leave some blue and black spaces showing. I focused on placing the purple on the edges and corners of the bag. Again, it's totally up to you where you put the purple :)

  9. Add some pink. This step is optional, but I really think it adds to the final look when you mix blue, purple, and pink. Like I did with the blue, I added a small amount of white paint to the pink in order to make it stand out a bit more. I also used the pink by itself to get more of a variation. You could also add some yellow for a more interesting effect, but I didn't have any yellow paint on hand.
  10. Dab on some white paint in random areas. BE VERY CAREFUL WITH THE WHITE PAINT! It is really easy to overdo it at this point, but as long as you take your time, you'll be fine. I tore a piece of the sponge off so I had a smaller tool to work with. I added white to the areas that looked brighter- I didn't go near the black or purple, but focused on the areas that were mostly blue and pink.


  11. OPTIONAL: Add silver glitter paint. This paint reminded me of stars twinkling in the night sky! Plus, you can't go wrong with glitter, right? Anyways, I took another small piece of sponge and lightly dabbed/swiped this silver paint in random areas. I really had no rhyme or reason for this, I literally just went for it. I added some extra silver paint on top of the white to add more interest to the bag.

  12. Add some stars. There are several ways to do this- if you have patience (unlike me) you can take a small paint brush and add stars in and around the white areas. Again, try to be random when placing the stars. It'll look better at the end, I promise! I decided to use a drinking straw to create my stars. Simply dip the straw in some paint, and then blow on the other end to create a cluster of stars. I added more stars in the lighter areas of the bag, but I also placed some in the darker/ black areas as well.
     

  13. Touch up any areas, if needed. There was one spot on my bag that had a little too much white, so I added some purple and blue paint to the edges to soften it up. Like I said before, you can always add more color if you see a spot that needs it.
  14. Enjoy your one-of-a-kind galaxy bag! Don't forget to clean up the mess ;) The paints I bought come off surfaces (and your hands) with warm water, soap, and a little bit of scrubbing.


Finished Product


Overall, I really love how this bag turned out! While I was working on, I didn't think it was going to turn out well at all. This project doesn't look good until you finally finish adding all the layers and details, so just keep working and adding things until your happy with how your bag looks. If you wanted to, you could paint the back of the backpack and the straps; I just left the back plain because I didn't feel like covering the whole thing. I think it would look good either way.

If you make this bag, or any other galaxy-inspired piece, be sure to leave a picture in the comments! I would love to see your masterpiece :)

Until next time, thanks for reading!

Keri <3

--------------------------------

8/25/2013 UPDATE!

I went back to Walmart today and picked up a black canvas bag. I had so much paint and supplies left over from this project, that I decided to use the same technique on this new bag. I think I'm going to use it as a travel makeup bag :)


Sorry this one is kind of blurry...


I took this one without a flash, and the colors seem to be the most accurate and true-to-life in this picture


For the whole scoop on this bag, check out this post on my beauty blog. Thanks again for reading :)

Keri <3

August 9, 2013

Random Pictures of the Animals

Hey there!

So, we basically have a zoo at our house. We have 6 dogs (including 1 foster), 2 guinea pigs, and a bearded dragon. Because we have so many animals, I tend to take a ton of picture while I'm at my parents house. I found some pictures that I thought were really cute/ interesting, and decided to share them on here :) 

Enjoy!

Charlee helps me crochet by laying on the piece I'm working on

Bo loves his Kong toy! Sometimes, he sits at the top of the stairs and throws the toy down the staircase (silly puppy!) 

Darcy likes to stare at the guinea pig cage 

Bo and Charlee are buddies now :)

I hope you liked these random pictures of some of our pets! Check back soon for more random goodness haha

Keri <3